Upcoming Live Events? Promote Them Through Your Wallet

What You Will Learn :
Learn about adding events in the Wallet Admin Portal, best practices in navigation, and how-tos in the Events Page.
What is the Events Page:
The Events page allows you to keep your subscribers in the loop about upcoming events at your business. Include a day and time, cost of admission, a title, and a brief description of the event to get your customers excited!
Why Events Page Matters:
Events may significantly assist a business in engaging with its audiences, whether it is to market a current or new product or service, to enhance communication and engagement between staff and clients, or even to bring teams together for the staff or a major celebration.
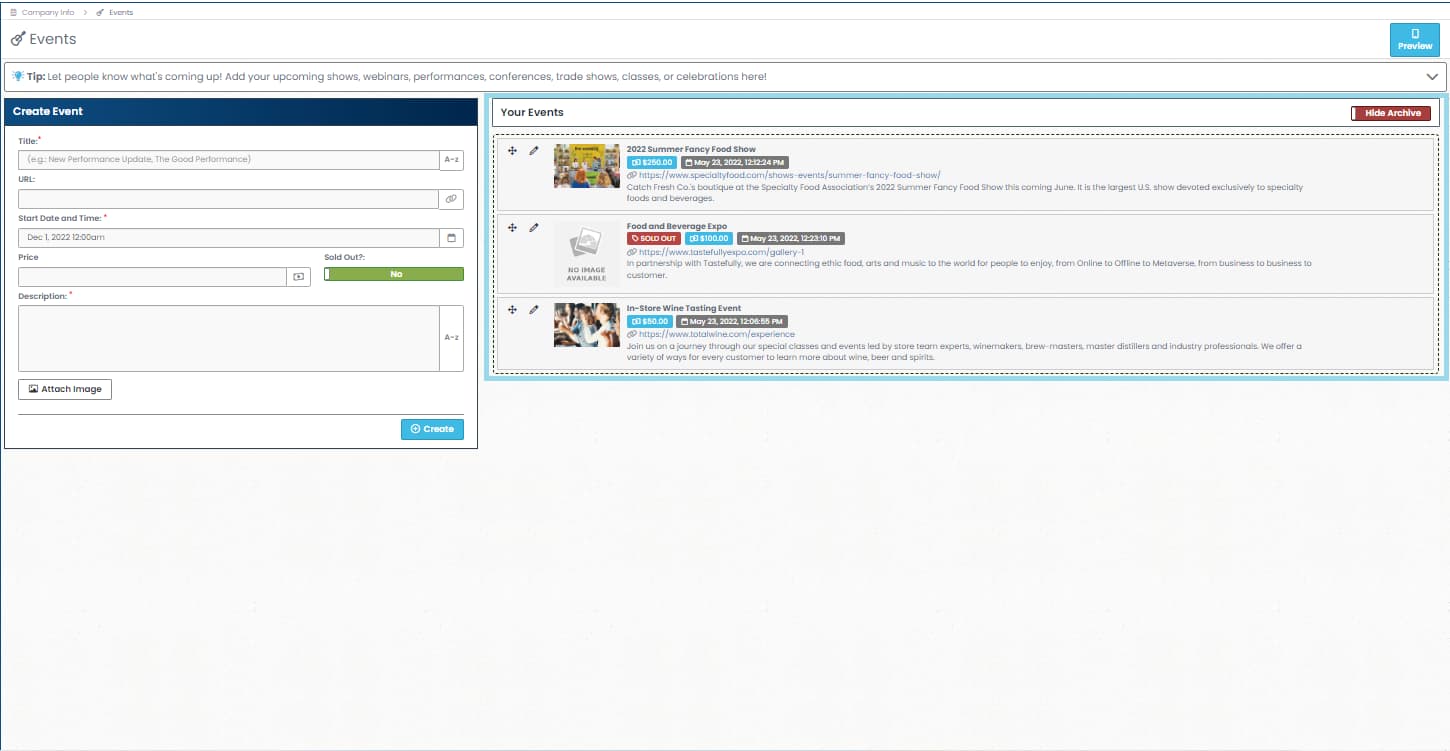
Admin Portal View of the Events

Digital App View of the Events Page
How to Add Events
-
Events is found on the left-hand side after clicking company info.
-
You will then get to see this area on the left-hand side which says create a live event.
-
And on the far right-hand corner or area is where you would see the live events that you have already listed in the app.
-
For you to create an event you would need the following

-
Title: In this field, you will enter the title of the desired live event to be posted.
-
Description: In this area a short description of the live event that you are about to list.
-
Link: This is where you put your shortened link with the use of the link shortener feature by Wallet Inc
-
Price: This is where you put the amount cost for the entry for the event.
-
Start Date and time: This is the area where you put in the schedule when the event will be held.
You will also have the option to modify the event if it is already sold out or if it is still ongoing.
And lastly, you can upload an image that entices the customer to click on the event that you are about to upload.

- Archiving events
On the right-hand corner we have a slide button that you can toggle should you want to Archive an event that is already done or completed.
This allows you as the merchant to modify an event if you are ever going to hold the same event, you can simply change the date and time on when the event will occur and click on restore.
And you should see that it is already back to the events showing currently live on the App.

You can select the ![]() icon to modify an existing event should you require to change anything.
icon to modify an existing event should you require to change anything.
You are also able to use the ![]() icon to drag the event and sort it according to your preference.
icon to drag the event and sort it according to your preference.
Related Topics: How to Add Blog & News